
Boating is a lot easier, safer and you look like you know what you’re doing, when you and your crew know how to tie and use just a few knots.
One knot in particular is most important when docking. When you and your crew know how to tie this one knot, it takes the fear out of docking and simplifies the docking procedure.
It makes the difference between a great versus a potentially disastrous docking.
Six knots (along with a few variations) will get you through life–not just boating. Learn one knot at a time and learn it well. Practice until it is as natural as talking or walking. The one we are learning today is probably the easiest knot to learn and most commonly used around docks—The Figure Eight Cleat Hitch Knot.
Figure Eight Cleat Hitch
The Figure Eight Cleat Hitch is mainly used to tie a dock line to a boat cleat and secondly to tie a boat line to a dock cleat.
It is the knot that we use in all our Docking Lessons. It is the first knot that your First Mate ties, and most importantly it ensures a safe successful stress-free docking.
A Figure Eight Cleat Hitch finished by a couple of half hitches is ideal for quickly and easily securing a boat to a dock. This knot can always be untied, even after a load. It is in the “Knots that Hold” category.
This knot’s proper name is “The Cleat Hitch”, but many people including us, refer to it as the “Figure Eight Cleat Hitch” or simply “The Figure Eight”.
Actually, there is another totally different knot called “The Figure Eight Knot” that is used to put a stopper at the end of a rope or line to stop it from running away through a pulley, block or fender eye. It is covered at the end of this newsletter.
Cleat Parts

The ends that extend out both sides of all cleats are called “horns” or “ears” and some people call them “flukes” or “arms”. I’ll refer to them as “horns”. The lower portion below the horns is simply called the “base“
How to Tie a Figure Eight Cleat Hitch
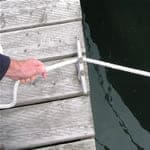 |
| Start by pulling the dock line snug, so the boat is where you want it. Pull the line around and under the cleat horn that is farthest from the boat or the load to be secured.This prevents the boat or load from pulling the line off the cleat. |
 |
| Wrap the line under the far horn. |
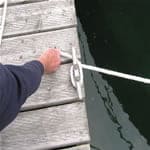 |
| Complete one full wrap around the base of the cleat. |
 |
| Cross over the top of the cleat diagonally to the opposite side at the other end (near end) of the cleat. |
 |
| Pass the line under the near horn. |
 |
| Cross over the top diagonally again. |
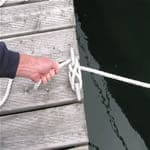 |
| Pass the line under the far horn again, forming a figure eight. |
 |
| Cross the cleat diagonally to the near horn. Don’t pass the line under the near horn. |
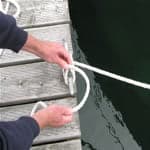 |
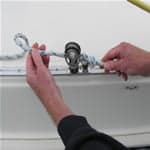
| To hold it from coming undone, finish off by dropping a half hitch over the near horn. To make a half hitch on the horn of a cleat, form a hitch (loop) by turning the free end of the line under that section coming from the far horn. |
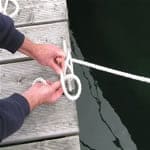 |
| Lower the hitch (loop) over the near horn. the line should finish by coming off the horn at the opposite end to which you started. |
 |
| Pull tight to snug the hitch. |
 |
| A completed Figure Eight Cleat Hitch. |
The Figure Eight Cleat Hitch can be tied with either hand or both hands. In the pictures above, Doug switched hands to stay out of the way of the camera. The pictures are taken from the vantage point of the person tying the knot, so it is from your perspective–not the reverse.
YouTube Video below is of Doug tying the Figure Eight Cleat Hitch to secure the boat to the dock cleat. Brenda is narrating.
Easy to Untie
A Figure Eight Cleat Hitch can always be easily untied, even after it has experienced a heavy load or force. It is the best and quickest knot for recreational boaters to use on a cleat—boat cleat or dock cleat.
Examples of Use:
- This Figure Eight Cleat Hitch only works on cleats, so wherever you have a cleat, you can secure any load/boat with a Figure Eight Cleat Hitch.
- When mooring overnight, whether at a dock or to a big rock in the lee of a secluded island, always run your lines back to the boat and secure with Figure Eight Cleat Hitches on the boat cleat. When the position of the boat needs to be adjusted during the night, because of a wind shift or tide, you can tighten or slacken the lines without leaving the boat. No stumbling around shore in the dark. You may have heard stories of people who have all eye-spliced ends on their boat cleats. They had to go ashore to adjust the lines.
- A Figure Eight Cleat Hitch is the best for securing a flag halyard on a flag pole cleat or sail halyard on a mast cleat.
- A Figure Eight Cleat Hitch works to secure an awning on the side of a house or motor home. It makes raising and lower easy.
Variations of Figure Eight Cleat Hitch
When the cleat is large enough and an extreme load is expected, lay on two or three extra eights before finishing with a couple of half hitches to distribute the load and prevent jamming and coming undone.
Centuries ago, before cleats were invented, vessels were tied to wharves using a pair of belaying pins. These were a pair of large vertical pins or posts that were positioned on the wharf, like a pair of steel rods or aboard the vessel like a pair of huge wooden dowels. Securing a rope to these belaying pins using a figure eight pattern, was called “Belaying a Rope”.
Tidy Up Excess Line
 |
| Line dropped “like a pile of spaghetti” on the dock is a disaster waiting to happen! After you have tied your Figure Eight Cleat Hitch knot, you can tidy up your extra dock line as follows: |
 |
| Hang it over the edge of the dock from the cleat as shown above. It is easy to do and the loose hanging line dries faster. |
OR coil up as a..
Flemish Flake
 |
| Start with the bitter end (loose end). |
 |
| Turn it clockwise with the lay or twist of the rope on the dock surface. |
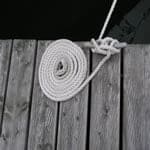 |
| Hold down all the line with both hands, as you turn it taking in all the slack. |
With braided line, you can go either way.
This will not only look neater and decorative, but will eliminate unsafe clutter on the dock’s walking surface, greatly reducing the chance of anyone tripping and falling. Note: If you leave a coiled line on the dock for long periods of time, it will deterioriate and so will the dock, because it concentrates the dampness.
Prepare Yourself and Your Crew
All of you should practice the Figure Eight Cleat Hitch, until you can tie it without thinking or delay.
Once you have tying down pat, from a squatting or bending position, try standing upright and throwing (flicking) the line over the horns like a cowboy. This will save you bending over and, in time, you can probably do it from your cockpit as well.
Flicking on the half hitches at the end is the tricky part. But, it is something to mess with during a wet afternoon at the marina, when there is nothing better to do. Even if you don’t get it mastered, it will create a fun activity with lots of laughter. You can even turn it into a contest or competition for even more fun.
Whoever masters it will certainly draw a crowd of admirers on the dock. Send us your video so we can add it to the site.
The Figure Eight Knot
As mentioned above, the “Figure Eight Knot”, sometimes called the “Figure Eight Stopper Knot”, is used to stop the end of a line from passing or running away through either a pulley or block or even a fender—because you are putting a lump in the line. It is so easy to tie.
To Tie a Figure Eight Knot
 |
| You start like tying a simple overhand knot at the end of the line. |
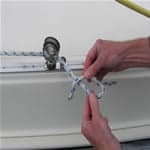 |
| Pass the bitter end back over the second half of the loop (bight), but don’t bring it back up through the loop like in an overhand knot. |
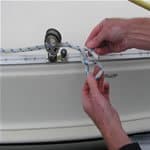 |
| Take the bitter end around behind the standing part of the line, then come back down through the loop forming a figure eight. |
 |
| Once tied, slide the knot to the position you want it, about 3″ from the end of the line. |
 |
| Pull tight to secure in place. |
Have fun with your ropes, lines & knots.
Knots are Free and Reliable
Learn them once and use them forever, year round.
Learn all six knots and you’ll be set for life
Click on the following link for more information and to order:
